That constant drip… drip… drip from your bathroom faucet is more than just an annoying sound. Each drop is wasted water that adds up on your utility bills. Left unchecked, a persistent drip can stain your basin, lead to limescale buildup, and even cause moisture damage over time.
While many online guides jump straight into the repair steps, they often miss the most important part: understanding why your faucet is dripping in the first time. This guide is different. We’ll walk you through diagnosing the problem, identifying the cause, and then carrying out the correct repair. You’ll learn not just how to fix the drip today, but how to prevent it from coming back tomorrow.
Understand the Drip Before Repairing
Before you reach for a wrench, take a moment to observe the drip. The way your faucet leaks can tell you a lot about the underlying problem.
- Continuous Drip: A steady, non-stop drip from the spout usually points to a worn-out internal component, like a washer or a cartridge, that is no longer creating a watertight seal.
- Drip After Turning Off: If the faucet drips for a minute or so after you turn it off and then stops, this could be due to “residual” water held in the spout. However, if it continues, it might indicate a more complex pressure-related issue.
- Drip From the Handle: A leak or ooze around the base of the handle (not the spout) suggests the O-rings or seals within the handle mechanism have failed. This is common when the faucet is turned on.
- Hot vs. Cold Side Leaks: On a double-handle faucet, if the drip is warm, the problem is likely in the hot water valve. If it’s cold, the issue is with the cold valve. This helps you isolate which side needs repair.
- Pressure-Related Dripping: Does the faucet only drip at certain times of the day, or after you’ve used another appliance? This could be linked to high water pressure in your home’s plumbing system, which puts extra strain on faucet components.
Why Faucets Start Dripping (Real Causes)
A dripping faucet is a symptom, not the core problem. Understanding the root cause is key to a lasting repair. Here are the most common culprits we see.
- Worn Washer: This is the classic cause in older compression faucets. The rubber washer is pressed against a valve seat to stop water flow. Over time, it hardens, cracks, or wears down, failing to create a perfect seal.
- Damaged Cartridge: Modern faucets use a plastic or brass cartridge. This self-contained unit controls water flow and temperature. Gaskets and seals inside the cartridge can wear out, causing leaks.
- Valve Seat Damage: The valve seat is the metal part that the washer or cartridge seals against. Over time, it can become corroded or coated with limescale, creating a rough surface that prevents a tight seal.
- Limescale and Hard Water: In areas with hard water, mineral deposits (limescale) can build up on internal components. This buildup prevents parts from moving freely and sealing correctly, leading to leaks.
- Pressure Imbalance: High water pressure puts constant stress on your faucet’s seals and washers, causing them to fail prematurely. Sometimes, thermal expansion from your hot water system can also cause temporary pressure spikes that lead to drips.
- Faulty Installation: An incorrectly installed faucet—perhaps with a misaligned cartridge or over-tightened connections—can lead to premature wear and leaks.
- Pipe Vibration: In rare cases, vibrations from pipes (known as ‘water hammer’) can cause faucet components to loosen over time, breaking the seal.
- Sediment Buildup: Tiny particles of rust or debris in your water lines can get caught in the faucet’s internal mechanism, damaging seals or preventing them from closing properly.
Identify Your Faucet Type
To get the right replacement parts, you first need to know what type of faucet you have. There are four main types found in UK homes.
- Compression Faucet: The oldest style, easily identified by its two separate handles for hot and cold that you have to turn several times to open or close fully. These use rubber washers.
- Ball Faucet: Typically has a single handle that moves over a rounded, ball-shaped cap at the base of the faucet. The handle moves up/down for pressure and left/right for temperature.
- Cartridge Faucet: Can have one or two handles. The handle movement feels very smooth and consistent. Single-handle versions move up/down and left/right, while double-handle versions usually only require a quarter or half turn.
- Ceramic Disk Faucet: The modern standard. These have a single lever that gives a smooth, effortless quarter-turn action. They contain two highly durable ceramic disks that control water flow. These are very reliable but can be damaged by sediment.
Tools & Preparation
A little preparation makes the job safer and easier. Gather your tools and set up your workspace before you start. You will likely need:
- Adjustable spanner or wrench
- Pliers
- Flathead and Phillips head screwdrivers
- Allen keys
- Replacement parts (washers, O-rings, cartridge)
- An old towel or cloth
- A small bowl for parts
Safety First:
- Turn Off the Water: The most critical step. Look for the small isolation valves on the pipes directly under the sink. Turn the screw-slot or lever a quarter turn to shut off the water to the faucet. If you can’t find them, you’ll need to turn off your home’s main stopcock.
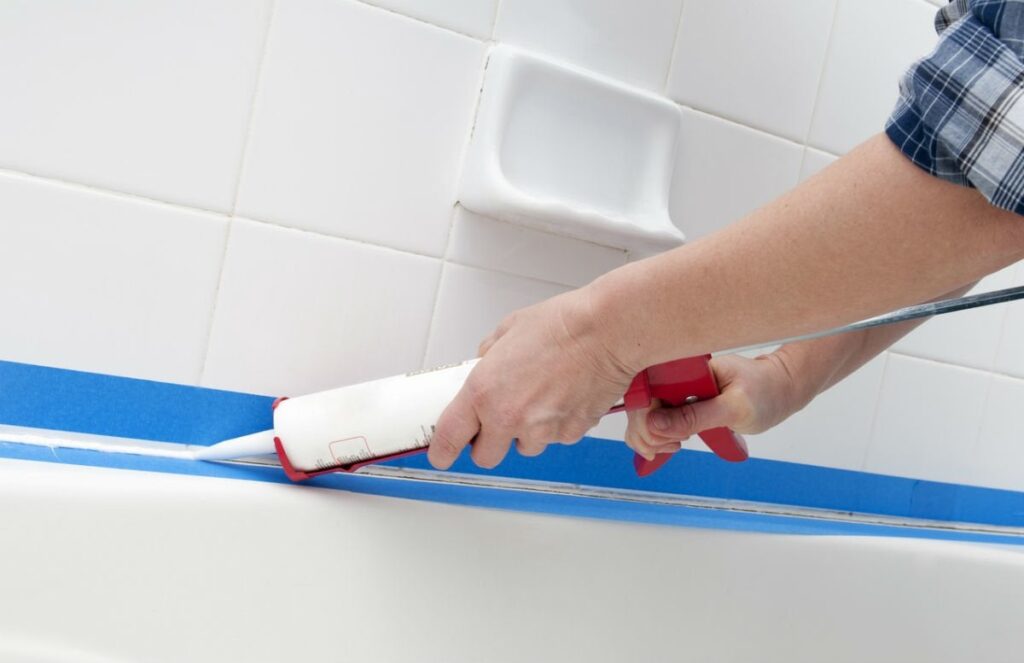
- Plug the Drain: Place the plug or a cloth over the drain opening. This will stop tiny screws or parts from disappearing down the plughole.
- Protect the Finish: If you need to use a wrench on the faucet’s body, wrap the chrome finish with a cloth to prevent scratches.
- Electrical Safety: If you are using power tools or have electrical sockets near the sink, be extremely careful. Water and electricity are a dangerous combination.
Step-by-Step Dripping Bathroom Faucet Repair
Once you have turned off the water and prepared your tools, you can begin the repair. We’ve broken down the steps for the most common scenarios.
How to Fix a Dripping Single-Handle Faucet (Cartridge/Ball/Disk)
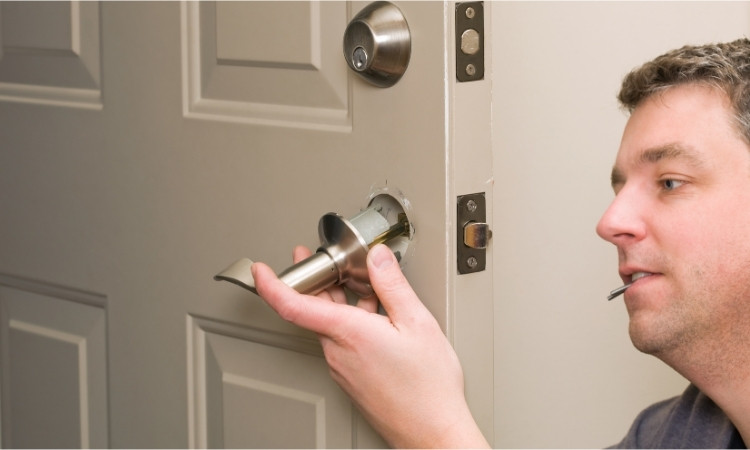
- Remove the Handle: Look for a small decorative cap on the handle. Pry it off gently with a flathead screwdriver to reveal a screw. Use an Allen key or screwdriver to loosen this screw and lift the handle off.
- Access the Cartridge: You may need to remove a decorative dome or cap that was under the handle. Unscrew this by hand. You will now see the top of the cartridge, often held in place by a retaining nut or clip.
- Remove the Cartridge: Use your spanner to carefully loosen the retaining nut. Take note of the cartridge’s orientation before pulling it straight up and out with pliers.
- Replace and Reassemble: Take the old cartridge to a DIY store to find an exact match. Insert the new cartridge, ensuring it’s aligned correctly. Reassemble the faucet in the reverse order you took it apart.
- Test: Turn the water supply back on slowly and check for leaks.
How to Fix a Dripping Double-Handle Faucet (Compression)
- Remove the Handle: Pry off the decorative cap (usually marked ‘H’ or ‘C’) and undo the screw underneath. Lift the handle off the valve stem.
- Expose the Valve: You’ll see a metal housing (the valve). Use your spanner to grip the hexagonal nut and turn it anti-clockwise to unscrew the entire valve mechanism.
- Replace the Washer: At the bottom of the valve, you will find a small rubber washer held in place by a screw. Unscrew it and replace it with a new one of the exact same size. It’s also a good idea to replace the O-ring around the body of the valve while you have it apart.
- Reassemble: Screw the valve mechanism back into the faucet body, re-attach the handle, and test your work.
How to Fix a Dripping Spout
A drip from the spout is almost always caused by a failed washer (compression faucet) or a faulty cartridge (mixer faucet). Follow the steps above for your faucet type to resolve the issue.
How to Fix a Dripping Handle
A leak from around the base of a handle is caused by a worn O-ring. On a double-handle faucet, you can replace this O-ring when you unscrew the valve mechanism. On a single-handle faucet, the O-rings are part of the cartridge assembly, so replacing the cartridge will solve the problem.
How to Fix a Drip After Shutoff
If the drip continues for a minute or two and stops, it might just be residual water. If it keeps going, the cause is usually a worn cartridge or washer that isn’t sealing completely. High water pressure can also be a factor, so if replacing the internal parts doesn’t work, you may need a professional to check your home’s water pressure.
When Repair Won’t Work
Sometimes, a repair isn’t the most sensible option. It might be time to replace the faucet if:
- It’s an older, low-quality faucet: The cost of parts and your time might be better invested in a new, more reliable model.
- The valve seat is badly corroded: On some faucets, the valve seat can’t be replaced. A corroded seat will shred new washers quickly, and the drip will return.
- The faucet body is cracked or corroded: If the metal itself is failing, a repair is only a temporary fix.
- Parts are obsolete: For very old or obscure faucet brands, finding replacement parts can be impossible.
- The cost of repair is high: If you need a specialist cartridge that costs almost as much as a new faucet, replacement offers better value.
A good quality bathroom faucet should last 10-15 years. If yours is approaching that age and causing problems, a replacement is often the wisest long-term decision.
Prevent the Faucet From Dripping Again
Once your faucet is fixed, a little preventative maintenance can keep it working perfectly for years.
- Clean the Aerator: The small mesh filter at the tip of the spout is the aerator. Unscrew it every few months and rinse it out to remove sediment and limescale.
- Descale Regularly: If you live in a hard water area, use a descaling solution to clean your faucet’s exterior and aerator every 6 months.
- Check Your Pressure: If you suffer from recurring drips or noisy pipes, consider having a plumber install a pressure-reducing valve (PRV) on your water main.
- Lubricate O-Rings: When carrying out a repair, apply a small amount of plumber’s silicone grease to O-rings to keep them supple and improve the seal.
- Watch for Early Warnings: Don’t ignore a handle that feels stiff, gritty, or loose. These are early signs that a component is starting to fail.
How Much Water (and Money) a Drip Wastes
It’s easy to dismiss a small drip, but the waste is staggering. A faucet dripping at just one drop per second can waste over 11,000 litres of water per year. That’s enough to fill over 140 bathtubs. With rising water rates, that translates directly into a higher bill for water you never even used. Fixing a drip is not just about peace and quiet; it’s an easy way to save money and conserve a valuable resource.
When to Call a Professional
While many faucet repairs are suitable for a competent DIYer, there are times when it’s better to call in a professional.
- You can’t turn off the water or the isolation valve is seized.
- You have an older, complex faucet and can’t identify the parts.
- A part is stuck fast and you risk breaking the faucet trying to remove it.
- You’ve replaced the parts, but the drip persists.
- You suspect the problem is related to high water pressure.
Attempting a repair beyond your skill level can turn a small drip into a major leak, causing significant water damage. If you’re in any doubt, it’s always safer and more cost-effective in the long run to get expert help.
For homeowners in Southport, Ormskirk, Preston, Liverpool and the surrounding areas, the experienced team at EM Bathrooms is always here to help. We can quickly diagnose the problem and carry out a professional, lasting repair.
People Also Ask
How do I get my bathroom faucet to stop dripping?
First, turn off the water supply using the isolation valves under the sink. Then, identify your faucet type (compression, cartridge, etc.) and replace the worn internal part, which is usually a rubber washer or a plastic cartridge.
Can I fix a dripping faucet myself?
Yes, in many cases, fixing a dripping faucet is a straightforward DIY job if you have the right tools and replacement parts. However, if the faucet is old, parts are seized, or you suspect a pressure issue, it’s wise to call a professional.
What is the most common cause of a dripping faucet?
The most common cause is a worn-out rubber washer or a failing cartridge. These components create the seal that stops water flow, and over time they degrade, allowing water to seep through and drip from the spout.
How to fix a bathroom tap that drips?
Fixing a dripping bathroom tap involves shutting off the water, dismantling the handle, and replacing the internal seal. For older taps, this is a rubber washer. For modern mixer taps, this is a self-contained cartridge.
Frequently Asked Questions
- I replaced the washer, but my tap still drips. What’s wrong?
If a new washer doesn’t fix the drip, the problem is likely a damaged or corroded valve seat—the metal rim the washer presses against. The seat may need to be re-ground with a special tool or, if it’s too damaged, the entire faucet may need replacing. - How do I know which size washer or cartridge to buy?
The best way is to take the old part with you to the hardware store. There are dozens of variations, and getting an exact match is crucial for a successful repair. - Why does my faucet handle feel stiff?
A stiff handle is often caused by limescale buildup on the valve or cartridge. It can also happen if the O-rings have dried out. Dismantling and cleaning the components, along with applying plumber’s grease to the O-rings, usually solves this. - Is it expensive to have a plumber fix a dripping faucet?
For a standard faucet repair, the cost is usually very reasonable and consists of a call-out fee plus the price of any parts. It is almost always cheaper than the cost of water damage from a failed DIY attempt. - How long should a faucet cartridge last?
A good quality ceramic disk or brass cartridge can last for 10 years or more. Cheaper, plastic-based cartridges may only last a few years, especially in hard water areas. - The drip is coming from the base of the spout where it swivels. How do I fix that?
A leak from the base of the spout is caused by worn O-rings located inside the faucet body where the spout sits. To replace them, you typically need to lift the entire spout off, replace the rings on the faucet body, and then re-seat the spout.
Need a Hand With Your Dripping Faucet?
If you’ve tried a DIY repair and are still stuck, or simply want the peace of mind that comes with a professional job, we’re here to help. EM Bathrooms provides expert faucet repair and replacement services across Southport, Formby, Ormskirk, Bootle, Preston, and Chorley.
Contact us today for a friendly chat and a no-obligation quote. Let’s get that drip sorted for good.